Think about how many sinks you have in your house. They’re all over the place! Adding a copper sink to your kitchen, bathroom, or another part of your house is a great way to add style and class to your decorations. Now we’ll look at how to effectively care for a copper sink so that it will maintain its good look and last longer.
Copper sinks can add an attractive accent to any room, in a place where people often expect dull porcelain or brushed metal. Copper evolves with time as it reacts with its surroundings. You will notice that with time, your copper sink will look even more beautiful (or worse) depending on how you treat it. Ensuring that your sink improves its attractiveness with age requires proper cleaning techniques.
Copper sinks come into a variety of finishes, the most common finish colors are clear, dark brown, or a custom natural-red. The colors are created as a result of accelerating the aging process of the sink. To maintain that beautiful look of your copper sink, follow these instructions:
- Cleaners. You do not need to have any specific cleaners. In fact, if you use hard cleaners on a copper sink with a patina (weathered finish), chances are that you will hurt the surface of your sink. Use a soft cotton cloth to clean your sink. Avoid using hard chemicals too as they will damage your sink’s finish.
- Hard water If you happen to have hard water running through your tap, do your best to keep your copper clean. Dry it with a soft cloth after washing. Hard water gives copper sinks a spotty, unattractive appearance, especially on hammered copper sinks. To prevent this further, apply wax on your sink periodically. This will allow your sink maintain its luster.
- Acid foods. Avoid leaving acidic foods on your sink surface for a prolonged period of time. Foods like tomatoes, oranges, lemons contain acids that leave a shiny spot on the finish of your copper sink. If this happens accidentally, just wash the sink with soap and water and wait for the finish to recover its patina. The copper will age with time and the spot will gradually blend in with the rest of the sink.
For custom copper sinks with natural reddish color, the maintenance process remains the same as it is for dark and clear brown finished sinks. However, you are advised to apply lacquer regularly to help protect it and slow the aging process.
To maintain shiny and washed finishes on your custom sink, you will need to consistently care for your sink. An acid wash also helps in obtaining a beautiful bright look. Remember to rebuff and clean your sink with a copper cleaner regularly. If your sink is in a kitchen or another place where you don’t want to use copper cleaner, you can also make an organic copper cleaning product with equal parts lemon juice and salt. After cleaning your sink, protect it’s surface with wax coating. If you adhere to these instructions, your copper sink will continue looking beautiful and new.
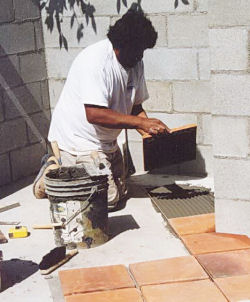
 Handmade high temperature wood fired terracotta clay floor tile should be installed on either a properly reinforced concrete slab or 3/4″ minimum thickness steel-reinforced (expanded metal lath) grout bed over a slip sheet over floor sheathing over wood or metal framing.
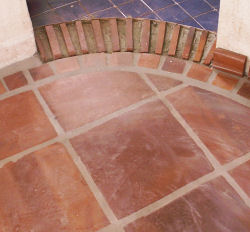 Determine the desired grout joint width prior to tile installation. Different tile patterns and tile sizes employ different grout joint widths in order to maximize the design impact of the overall tile installation.
 Prior to grouting the joints between the tiles, decisions should be made on the color of the grout, the texture of the finished grout, and the amount of indentation of the grout joint, if any. Color charts are available from which grout color selection can be made. Grout texture can vary from a very smooth steel tooled finish to a very rough sack-rubbed finish. The grout can be finished so its full joint width is flush with adjacent tiles, it can be finished with a deep concave indentation, or anything in between.
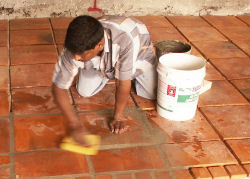
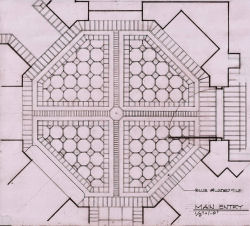 Once all joints have been grouted, allow the grout to fully dry prior to any additional finish coat application. When the grout joints are fully dry, apply one coat of the tile finishing material to the grout joints so the will have a covering similar to that of the tile that received the first protective finish coat prior to grouting.
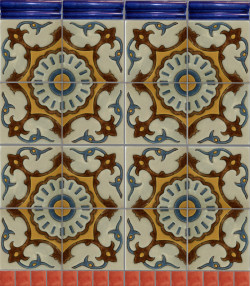 Floors are an important part of any house interior. Floor