
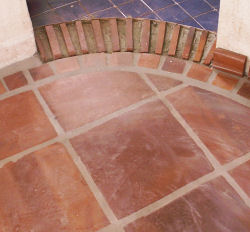
This unique handmade clay terracotta floor tile is manufactured in only a few places in the world where the mineral content of the clay mixture and the use of wood firing at high temperatures create clay tiles that are imbued with an array of many colors and have a high resistance to wear. 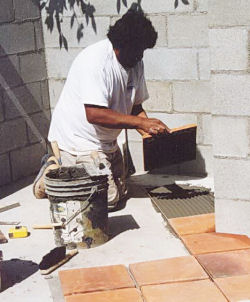
As beautiful and as strong as the terracotta clay tile is, without proper installation and finishing, the true potential of this product cannot be achieved. Below, information is provided on the salient elements of a successful handmade terracotta clay tile installation. The finishing of this type of tile is covered in another article, “Handmade High Temperature Wood Fired Terracotta Clay Floor Tile – Finishing Guidelines”.
Surface on which tile is to be installed
 Handmade high temperature wood fired terracotta clay floor tile should be installed on either a properly reinforced concrete slab or 3/4″ minimum thickness steel-reinforced (expanded metal lath) grout bed over a slip sheet over floor sheathing over wood or metal framing.
Wood Floor Installation
If the handmade clay floor tile installation is on a wood floor, the maximum floor deflection should be no greater than the floor joist span (in inches)/720 for joist spans up to 14′-0″, with the maximum floor deflection not exceeding 7/32″, using total floor dead load, including framing, grout bed, crack isolation membrane (if used), setting compound, and handmade terracotta tile. The steel-reinforced grout bed should be as per the Marble Institute of America’s Dimension Stone Design Manual, Volume 6, Chapter 13, Horizontal Surfaces, page 181, Detail 3 “MORTAR BED OVER WOOD SUBFLOOR”. Grout bed thickness should be a minimum of 3/4″. The isolation membrane should be a 30# minimum building paper.
Crack Isolation Membrane
If tile installation is to be on a slab that shows signs of significant cracking (wide enough in which a business card will fit), the use of a crack isolation membrane is suggested to minimize the chance of the slab’s crack being transmitted into the handmade clay floor tile.
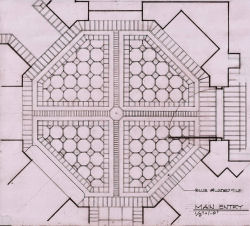
Grout Joint Width
 Determine the desired grout joint width prior to tile installation. Different tile patterns and tile sizes employ different grout joint widths in order to maximize the design impact of the overall tile installation.
Thinset Compound Tile Adhesive
Select a thinset compound that has been manufactured specifically for the application intended (interior application or exterior application). Thinset compound should be applied with 1/2″ “V” notched trowel to both the surface to receive the tile (slab or grout bed) and the back of the handmade terracotta
clay tile. The thinset compound should cover 100% of both the surface to receive the tile and the back of the tile. The handmade terracotta clay tile shall be applied to the thinset-covered slab or grout bed on the wood subfloor such that the direction of the trowel marks on the back of the tile shall be perpendicular to the trowel marks on the floor. Move the set tile 1/8″-1/4″ back and forth to obtain full adhesion and to minimize any air pockets under the tile. Visually determine that the fully set tile is as level as possible
with adjacent tiles. Since this is a handmade tile, it has dimensional and leveling variations from tile to tile.
Grouting Joints Between Tiles
 Prior to grouting the joints between the tiles, decisions should be made on the color of the grout, the texture of the finished grout, and the amount of indentation of the grout joint, if any. Color charts are available from which grout color selection can be made. Grout texture can vary from a very smooth steel tooled finish to a very rough sack-rubbed finish. The grout can be finished so its full joint width is flush with adjacent tiles, it can be finished with a deep concave indentation, or anything in between.
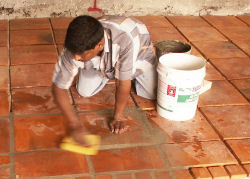
The tile and its setting compound should be completely dry prior conducting any part of the joint grouting. Prior to the installation of any grout, the tile should receive a coat of grout release compound or at least one coat of the first coat of the selected tile finish. This protects the tile from discoloration due to grout getting on the face of the tile, either during grout installation or grout clean-up.
 Once all joints have been grouted, allow the grout to fully dry prior to any additional finish coat application. When the grout joints are fully dry, apply one coat of the tile finishing material to the grout joints so the will have a covering similar to that of the tile that received the first protective finish coat prior to grouting.
Finishing
At this point, the fully grouted tile is ready for finish coat application.